Keeping our homes and workplaces clean and organized is crucial for maintaining hygiene and orderliness. Cleaning tasks such as wiping surfaces, sweeping floors, and doing laundry may seem tedious to some, but it's a therapeutic and satisfying activity that keeps our surroundings neat. In addition, cleaning helps reduce clutter.
Today, we'll explore the benefits of using Adobe Photoshop to clean and improve the overall health of our images, ensuring they always look fresh. Ultimately, regular cleaning is a necessary activity that we should all prioritize for healthier and more pleasant final retouches.
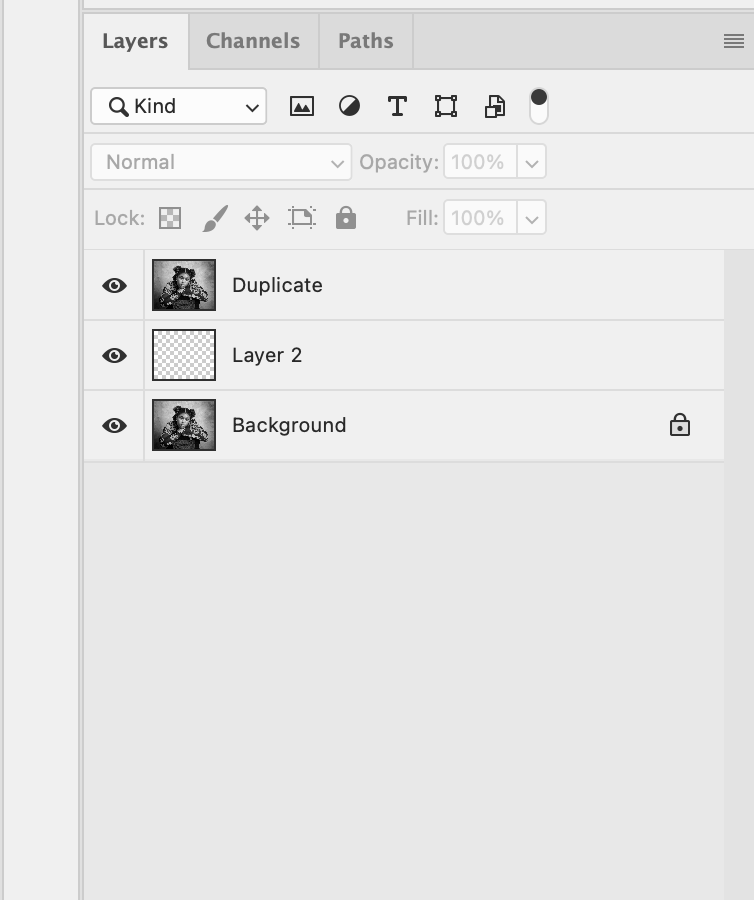
First things first, we're going to open our image in Photoshop if we still need to. We need two additional layers stacked on top of our original, so we'll first (1) Create a copy of the background or main image.
To create a copy of the background or main image:
Duplicate it.
Insert a new layer between the two layers.
Then we'll:
Convert the first layer to a smart object by navigating to the:
Filters menu and selecting "smart filters." Click “OK” once the popup bar appears.

The next step we need to take is converting our image (duplicated) to a high pass. This will allow us to edit our image (main) without damaging the original. Go to filter again and turn the image to highpass going to:
other > highpass
Start from 0.1 and turn the dial until you see the ring around the eyes, mouth, or dark shadows. After, you can change the blend mode from normal to overlay, and once done, hold the option key while the first layer is selected and click the second layer. This task will ensure that all changes are directed to the empty layer created in the beginning.


Click the sample layer and make sure the sample size is five by five average and the sample is set to current & below. Set your brush flow to 5% and brush around the dark area.


Below I started playing around with the brush tool to demonstrate: